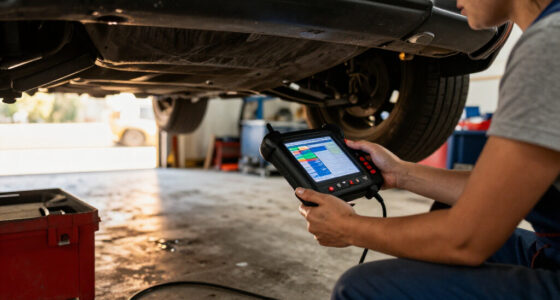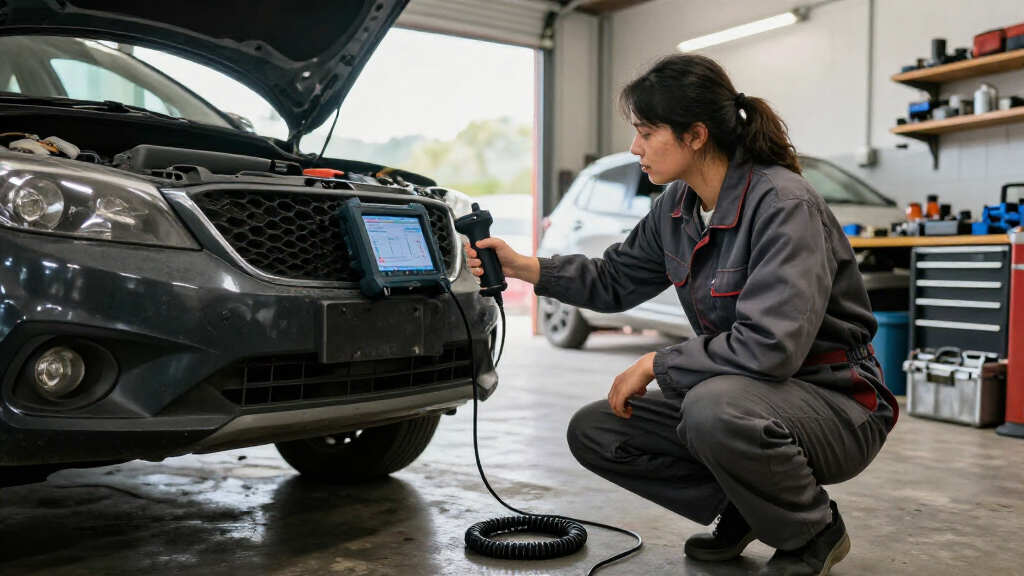
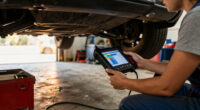
Use this guide to connect an automotive diagnostic scan tool, read and save diagnostic trouble codes, review available live data, and check whether a repair resolved the reported issue. It is for drivers and beginning DIY mechanics who can safely access the vehicle’s diagnostic connector. Most scans take 20-45 minutes; diagnosing an intermittent or complex fault can take longer.

Get business pricing on garage and car supplies
- Business-only prices and quantity discounts
- Tax-exempt purchasing
- Multiple users, one account, clear invoices

Autel MaxiCOM MK900BT Bidirectional Automotive Diagnostic Scanner
- ✔ Display: 8-inch
- ✔ Active tests: More than 3,000
- ✔ Service functions: More than 40

Autel MaxiCOM MK808S Automotive Diagnostic Scanner
- ✔ Display: 7 inches
- ✔ Memory: 4 GB
- ✔ Processor: RK3566

ANCEL AD310 OBD II Diagnostic Code Reader
- ✔ Vehicle compatibility: OBD II vehicles, including 1996+ US and 2000+ EU and Asian vehicles
- ✔ Supported protocols: KWP2000, J1850 VPW, ISO9141, J1850 PWM, CAN
- ✔ Cable length: 2.5 ft
Difficulty: Beginner | Time: 20-45 minutes
What You’ll Need
Tools & Materials:
- OBD-II scan tool or compatible scan-tool app and adapter
- Vehicle owner’s manual
- Phone or notebook for recording codes and observations
- Flashlight, if the diagnostic connector is hard to see
Knowledge:
- Basic familiarity with the vehicle’s ignition or start controls
- Ability to identify the vehicle identification number (VIN) and model year
Most gasoline vehicles sold in the United States from model year 1996 onward have OBD-II. Other regions and vehicle types may use different standards or connectors. Check the tool’s vehicle coverage before buying or connecting it. A basic code reader may show emissions-related engine codes only; manufacturer-specific systems such as ABS, airbag, transmission, or body controls may need a more capable tool.
Autel MaxiCOM MK900BT Bidirectional Automotive Diagnostic Scanner
The MK900BT earns the top spot because it combines broad system coverage with tools for investigating what a code means in operation. It reads and clears codes across supported systems, displays live data, and offers more than 3,000 active tests. Those bidirectional controls can help a technician command supported components and observe their response, making this a more involved diagnostic tool than the AD310, which is limited to emissions-related engine checks.Its 40-plus service functions, CAN FD and DoIP support, and automatic vehicle identification give it the widest stated feature set in this group. Bluetooth VCI connectivity gives the tablet more freedom of movement around a vehicle than the wired MK808S, while Wi-Fi report printing can help keep pre- and post-scan records organized. These additions matter most in a repair workflow that spans multiple systems and vehicles, rather than occasional check-engine-light questions.That breadth comes with caveats. Autel notes that vehicle and function compatibility varies, and the battery test requires a separately purchased BT506. The included software updates run for one year, so buyers should factor ongoing update needs into their ownership plans. Compared with the MK808S, the MK900BT is the more capable and flexible option on paper; compared with the simpler AD310, it is intended for substantially deeper diagnostics. It makes the most sense when those extra capabilities will be used, not merely because the feature count is larger.
Pros:
- All-system diagnostics with live data and data recording and playback.
- More than 3,000 active tests and more than 40 service functions on supported vehicles.
- Supports CAN FD and DoIP, with automatic vehicle identification.
- Bluetooth VCI and Wi-Fi report printing support a flexible scan-and-document workflow.
Cons:
- Vehicle and function support varies, so feature coverage should be checked for the exact vehicle.
- Battery testing requires the separately purchased BT506.
- Software updates are included for one year.
Best for: Technicians and experienced DIYers who need multi-system scanning, supported bidirectional tests, and a broad set of service functions.
Not ideal for: Drivers who only want to check and clear common engine emissions codes, or buyers who need confirmed support for a specific function without first checking vehicle compatibility.
Bottom line: Choose the MK900BT when you need the broadest diagnostic and service toolkit in this comparison and have confirmed your vehicle supports the functions you plan to use.
“Choose the MK900BT when you need the broadest diagnostic and service toolkit in this comparison and have confirmed your vehicle supports the functions you plan to use.”
Autel MaxiCOM MK808S Automotive Diagnostic Scanner
The MK808S is the practical middle ground for buyers who want a tablet-based, full-system scan tool without needing every advanced feature listed for the MK900BT. It reads system codes, shows live and freeze-frame data, and provides more than 3,000 active tests across supported vehicles. That makes it much closer to the MK900BT in diagnostic intent than the AD310, even though it has fewer stated service functions and lacks the MK900BT’s CAN FD and DoIP specification.A wired connection is its defining workflow tradeoff. A cable tethers the tablet to the diagnostic port, which limits how freely we can move around the vehicle compared with the MK900BT’s Bluetooth VCI. In return, the direct connection is described as stable and low-latency, a straightforward fit for users who work near the port and prefer not to manage a wireless link. Its 7-inch display, 4 GB of memory, and support for 21 menu languages make the interface more accommodating than the compact AD310 reader.The MK808S includes more than 28 service functions and gateway access for supported FCA, Renault, and VAG models. Those qualifiers matter: gateway access and particular active tests depend on the vehicle, so we should not treat the headline coverage as a guarantee for a specific car. Compared with the MK900BT, this is a simpler Autel tablet with fewer service functions and wired connectivity. Compared with the AD310, it is a major step up in system coverage, but likely excessive for a buyer who only needs basic engine-code information.
Pros:
- Full-system diagnostics with live data and freeze-frame information.
- More than 3,000 active tests and over 28 service functions on supported vehicles.
- Wired connection is described as stable and low-latency.
- 7-inch display, 4 GB memory, and 21 menu languages.
Cons:
- Functions and vehicle compatibility vary by model and year.
- Gateway access applies only to supported FCA, Renault, and VAG models.
- The wired connection limits movement compared with the MK900BT’s Bluetooth VCI.
Best for: DIY mechanics and independent workshop users who want full-system scanning, active tests, and service functions through a wired tablet.
Not ideal for: Buyers who need wireless movement around the vehicle, the MK900BT’s CAN FD and DoIP support, or only a basic emissions-code reader.
Bottom line: The MK808S is a strong fit when we want broad tablet diagnostics and active tests but do not need the MK900BT’s expanded protocol support and wireless workflow.
“The MK808S is a strong fit when we want broad tablet diagnostics and active tests but do not need the MK900BT’s expanded protocol support and wireless workflow.”
ANCEL AD310 OBD II Diagnostic Code Reader
The AD310 is the clear choice for a narrower task: checking common OBD II engine and emissions issues without stepping up to a diagnostic tablet. It reads and clears emission-related trouble codes, displays live data and freeze-frame information, and reports I/M readiness. Those checks can help us understand a check-engine light or see whether emissions monitors are ready, but they do not provide the all-system reach of either Autel model.Its appeal is the direct, low-complexity format. The reader draws power from the vehicle’s OBD II connector, uses labeled buttons, and includes a 2.5-foot cable. That is less flexible than the MK808S’s large tablet interface and far less capable than the MK900BT’s active tests, yet it suits occasional use where our question is simply whether an emissions-related code is present. Support for common OBD II protocols broadens its usefulness across compatible vehicles, including the stated US, EU, and Asian model-year ranges.The limit is important: the AD310 does not diagnose ABS, SRS, or transmission faults, and it will not work with OBD I vehicles even when an adapter is used. Compared with the Autel tablets, it cannot perform the broader system scans or service tasks that justify their greater complexity. Compared with them, it is easier to carry and operate for basic checks. We should choose it only when that limited scope matches the job, and skip it if a warning light may involve another system.
Pros:
- Reads and clears emission-related trouble codes.
- Displays live data, freeze-frame information, and I/M readiness.
- Supports several common OBD II protocols.
- Compact reader with labeled buttons, clear screen, and vehicle-connector power.
Cons:
- Does not diagnose ABS, SRS, transmission, or other non-emissions faults.
- Does not support OBD I vehicles, even with an adapter.
- Compatibility depends on the vehicle having an OBD II interface.
Best for: Drivers who want a simple, vehicle-powered reader for common OBD II engine codes, live data, freeze-frame details, and emissions readiness.
Not ideal for: Anyone diagnosing ABS, SRS, transmission, or other non-emissions systems, or working with an OBD I vehicle.
Bottom line: Pick the AD310 for straightforward OBD II emissions checks, but choose either Autel if you need to scan beyond the engine system.
“Pick the AD310 for straightforward OBD II emissions checks, but choose either Autel if you need to scan beyond the engine system.”
As an Amazon Associate we earn from qualifying purchases.
Before You Start
Park on level ground, select Park or Neutral, apply the parking brake, and keep the vehicle away from moving traffic. Follow the tool and vehicle instructions. Do not work near hot, moving, or high-voltage parts. A warning light or stored code is a clue, not a diagnosis: avoid replacing parts based on a code alone.
If the vehicle has a flashing check-engine light, severe shaking, overheating, low oil pressure, a fuel smell, or another urgent warning, stop driving when safe and seek qualified help. Do not clear codes before recording them; clearing can erase useful freeze-frame information and reset emissions monitors.
Step-by-Step Instructions
Step 1: Confirm tool and vehicle compatibility
Check the scan tool’s coverage list against the vehicle’s year, make, and model. Read its quick-start instructions and identify whether it supports the systems you need to scan. If you are using a phone adapter, install the recommended app and grant only the permissions it requires.
Tip: A connector may fit even when the tool cannot read every vehicle system. Confirm coverage before relying on a scan for ABS, airbags, or other non-engine faults.
Check: The tool powers on or the adapter pairs with the app, and the vehicle appears in its coverage information.
Step 2: Find the diagnostic connector
Use the owner’s manual or the tool instructions to locate the OBD-II port. It is commonly under the dashboard near the steering column, though some vehicles place it behind a small panel. Inspect the port for damage or debris without inserting tools or forcing the plug.
Tip: Use a flashlight if needed. Do not confuse the diagnostic port with a similarly shaped accessory connector.
Check: You can see a clean, undamaged connector that matches the scan tool’s plug.
Step 3: Connect the tool and set the ignition
With the vehicle parked and switched off, plug the scanner or adapter straight into the port. Do not force it; align the plug and press gently. Follow the tool’s instructions for ignition position. Many scans require the ignition on with the engine off, while some tests require the engine running.
Tip: Keep hands, cables, and clothing clear of belts and fans if the engine must run. Do not start the engine in an enclosed space.
Check: The scanner turns on or the app reports a connection, and the vehicle’s control module responds.
Step 4: Select the vehicle and run a scan
Choose the correct vehicle profile when prompted, or let the tool identify the vehicle automatically. Select the relevant system scan or read-codes function. Wait for the scan to finish, and note any modules the tool could not contact.
Tip: If the scanner asks for a VIN, compare the displayed value with the vehicle’s identification label or registration documents.
Check: The screen displays scan results, including codes, system status, or a clear message that no codes were found.
Step 5: Record codes and status before changing anything
Write down each code exactly as shown, including its letter and digits, and record the system, description, and status such as current, pending, or history. Save or photograph freeze-frame data if available. Note the mileage, warning lights, symptoms, and conditions when they occur.
Tip: A code description points to a circuit or condition to investigate; it does not prove that a named part has failed. Preserve the original results before clearing codes or disconnecting the battery.
Check: You have a complete record of the codes and any available freeze-frame details.
Step 6: Review relevant live data
Open live data only when it can help explain the symptom. Select a few relevant readings, such as engine temperature, engine speed, fuel trims, or oxygen-sensor data, and compare them with the tool’s guidance or reliable vehicle service information. Note whether readings are taken with the engine cold, warm, idling, or under a specific condition.
Tip: Do not treat a single reading as a diagnosis. Incorrect units, a cold engine, or a changing operating condition can make normal data look unusual.
Check: You can identify which readings were captured and under what operating conditions.
Step 7: Use the results to choose a next action
Look up the recorded code in reliable service information for the exact vehicle. Follow the diagnostic checks for that code, such as inspecting a connector, checking a fuse, or measuring a specified circuit. If the procedure requires specialized equipment, airbag-system work, high-voltage work, or a safety-critical repair, have a qualified technician continue.
Tip: Do not erase codes just to switch off a warning light. Fixing the underlying cause is what matters.
Check: You have a documented, vehicle-specific diagnostic next step or a clear reason to refer the vehicle to a technician.
Step 8: Verify the repair and rescan
After the repair, reconnect the tool and repeat the scan under the same safe conditions. Compare current and pending codes with your original record. If the repair instructions call for a drive cycle, follow the vehicle-specific procedure and rescan afterward. Clear codes only when appropriate and after saving the original information.
Tip: A light that goes out immediately does not prove the repair passed every monitor. Some monitors need normal driving conditions and time to complete.
Check: The symptom is gone, the relevant code does not return, and the tool reports monitor status consistent with the vehicle’s service procedure.
Step 9: Disconnect and store the tool
Turn the ignition off if the tool’s instructions call for it, then unplug the scanner by its connector rather than pulling on the cable. Store the tool and your notes together. Keep the code history with the vehicle’s service records.
Tip: Some Bluetooth adapters can draw power while left connected. Remove them after the scan unless the manufacturer says they are designed for continuous use.
Check: The tool is disconnected without damage, and the scan and repair records are saved.
Common Mistakes to Avoid
- Replacing a component because its name appears in a code description. — Use the code as a lead. Check vehicle-specific diagnostic steps, wiring, connectors, and related conditions before choosing a repair.
- Clearing codes before saving them. — Record every code, status, and available freeze-frame detail first; clearing can remove evidence needed for diagnosis.
- Using a tool that only reads engine codes for an ABS or airbag warning. — Check system coverage for the exact vehicle and fault before scanning.
- Assuming a warning light staying off means every monitor has passed. — Check readiness status and follow any required drive cycle before judging the repair.
Troubleshooting
Problem: The scanner does not power on.
Solution: Check that the plug is fully seated and the ignition is in the position specified by the tool. Consult the owner’s manual for the diagnostic-port fuse; replace a failed fuse only with the specified type and rating.
Problem: The tool powers on but cannot communicate with the vehicle.
Solution: Confirm the selected vehicle, ignition position, and tool coverage. Try a supported connection method and inspect the port for visible damage. If communication still fails, have the connector, fuse, or vehicle network checked.
Problem: The tool reports no codes, but a warning remains on.
Solution: Check whether the warning belongs to a system the tool can access. Use a scanner with the needed module coverage or ask a repair shop to scan the vehicle.
Problem: The code returns after clearing or after a repair.
Solution: Record the returning code and its status, then follow the vehicle-specific diagnostic procedure. Recheck the repair and related wiring or conditions rather than repeatedly clearing the code.
What Success Looks Like
The scan is complete when you have recorded the vehicle details, every available code and status, relevant freeze-frame or live-data conditions, and any modules the tool could not reach. After repair, the symptom should be resolved and the relevant code should not return during the prescribed verification. Readiness monitors may need a drive cycle; check their status against the vehicle’s service instructions.
Next Steps
Keep the original scan, repair details, and follow-up results with the vehicle’s maintenance records. If a code returns, a warning affects braking or steering, or the diagnosis requires electrical measurements or system-specific procedures, arrange a professional inspection. Re-scan after the repair or when a new warning appears, and record the conditions each time.
Frequently Asked Questions
Can I use a scan tool while the engine is running?
Some live-data checks require the engine to run, but basic code reading often uses ignition on with the engine off. Follow the tool and vehicle instructions, and keep clear of moving parts. Never run the engine in an enclosed space.
Will a basic OBD-II reader show ABS or airbag faults?
Often it will not. Many basic readers cover emissions-related engine systems only. Check the tool’s coverage for the vehicle and specific module before buying or using it.
Should I clear a code after reading it?
Save the code, status, and freeze-frame data first. Clear it only when appropriate after recording the information and addressing the fault; a returning code can help confirm that the issue remains.
Why does the check-engine light return after I clear a code?
The vehicle may still detect the fault, or a monitor may detect it again after its test conditions are met. Record the new code and follow its diagnostic procedure instead of repeatedly clearing it.
How do I know whether a repair worked?
Check that the symptom is gone, the relevant code does not return under the prescribed conditions, and required readiness monitors complete. A technician can help when the fault is intermittent or the verification procedure is unclear.