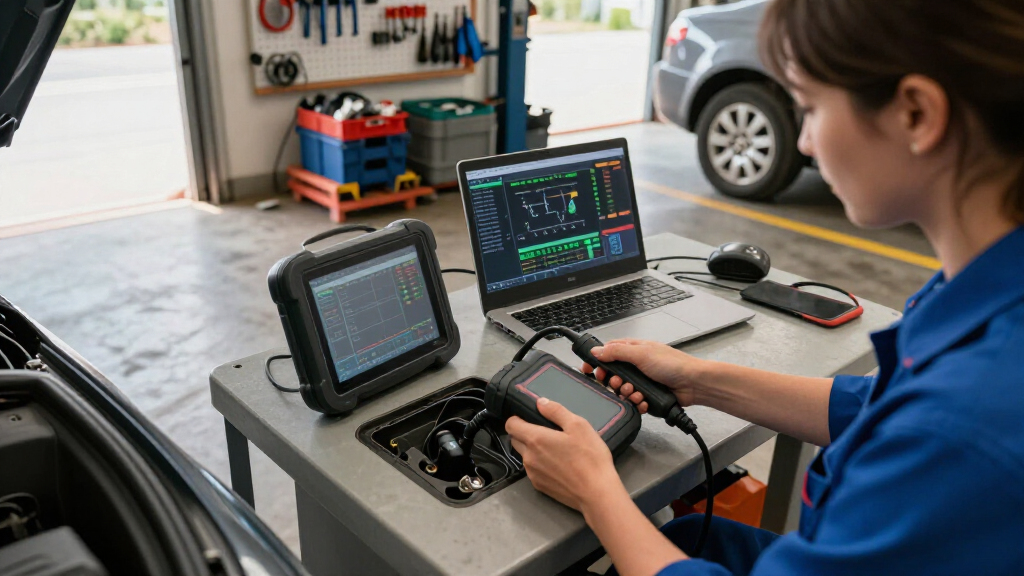
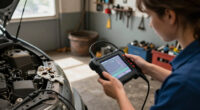
This guide provides step-by-step instructions for using an automotive diagnostic scan tool to identify vehicle issues. It is designed for car owners and DIY enthusiasts with basic mechanical knowledge who want to perform simple diagnostics themselves. Expect to spend about 30 to 45 minutes gathering tools, connecting the device, and analyzing the results. Whether you’re troubleshooting check engine lights or verifying repairs, this guide will help you understand the process and avoid common pitfalls.

Get business pricing on garage and car supplies
- Business-only prices and quantity discounts
- Tax-exempt purchasing
- Multiple users, one account, clear invoices

ANCEL AD310 Classic Enhanced Universal OBD II Scanner Car Engine Fault Code Reader
- ✔ Compatibility: 1996 or newer OBD2 vehicles, including US, EU, and Asian models
- ✔ Protocols Supported: KWP2000, J1850 VPW, ISO9141, J1850 PWM, CAN
- ✔ Dimensions: 8.9 x 6.9 x 1.4 inches

FOXWELL NT604 Elite OBD2 Scanner ABS SRS Transmission Diagnostic Tool
- ✔ Compatibility: Over 60 vehicle brands worldwide
- ✔ Functions: OBD2, ABS, SRS, Transmission codes
- ✔ Display: Live data streaming

ANCEL AD410 Enhanced OBD2 Scanner, Vehicle Code Reader for Check Engine Light
- ✔ Compatibility: 1996+ OBD2 vehicles, US, EU, and Asian models
- ✔ Display: 2.4-inch color screen
- ✔ Protocols Supported: CAN, ISO9141, KWP2000, J1850 VPW, J1850 PWM
Difficulty: Intermediate | Time: 30-45 minutes
What You’ll Need
Tools & Materials:
- Automotive diagnostic scan tool (OBD-II scanner)
- Device with compatible software (smartphone, laptop, tablet)
- Basic hand tools (optional, for accessing the vehicle’s OBD port)
- Vehicle owner’s manual (optional)
Knowledge:
- Basic understanding of vehicle systems and the OBD-II port
- Familiarity with reading vehicle indicator lights
Ensure the scan tool is compatible with your vehicle make and model. Charge your device beforehand. Have your vehicle parked on a flat, level surface with the parking brake engaged. Turn off the engine before connecting the scanner, unless the device specifically requires the engine to be running for diagnostics.
ANCEL AD310 Classic Enhanced Universal OBD II Scanner Car Engine Fault Code Reader
The ANCEL AD310 stands out for its simplicity and portability, making it a top choice for those who want quick engine fault reads without complexity. It supports all OBDII protocols, ensuring broad vehicle compatibility from 1996 onward, which is crucial for most users. Compared with more advanced tools, it cannot diagnose ABS, SRS, or transmission issues, limiting its scope to emission-related engine problems. Its compact design and lack of batteries make it easy to carry and operate on the go, but it’s not suitable for users needing full-system diagnostics or advanced repair functions. This model is perfect for DIYers who need a reliable, no-frills scanner for routine checks, but it’s not ideal for professional garages requiring multi-system diagnostics.
Pros:
- Supports all OBDII protocols and vehicle compatibility
- Compact, lightweight, and portable
- Fast and accurate fault code reading and clearing
Cons:
- Limited to emission-related engine diagnostics
- Cannot diagnose ABS, SRS, or transmission systems
- Incompatible with OBDI vehicles
Best for: Home mechanics or DIYers seeking quick engine fault codes on most 1996+ vehicles.
Not ideal for: Professionals needing ABS, SRS, or transmission diagnostics, or users requiring full-system scans.
Bottom line: A reliable, portable choice for basic engine diagnostics, best suited for casual DIY use without system coverage beyond emissions.
“A reliable, portable choice for basic engine diagnostics, best suited for casual DIY use without system coverage beyond emissions.”
FOXWELL NT604 Elite OBD2 Scanner ABS SRS Transmission Diagnostic Tool
The FOXWELL NT604 Elite is designed for users who need a comprehensive scan tool capable of diagnosing multiple vehicle systems. Its support for engine, ABS, SRS, and transmission codes makes it a versatile choice, especially for those who perform more complex repairs or want detailed insights into their vehicle’s health. The inclusion of a durable case and lifetime software updates enhances its value, minimizing ongoing costs. Compared to the simpler ANCEL AD410, this scanner is more complex but offers extensive system coverage, which is especially beneficial for owners of multiple vehicle brands or professionals. However, it does not support maintenance functions like oil resets or battery registration, which limits its scope for some routine services. This pick is ideal for experienced DIYers or professionals seeking a single tool for broad diagnostics across vehicle systems.
Pros:
- Supports engine, ABS, SRS, and transmission diagnostics
- Lifetime free software updates
- Includes AUTOVIN feature for quick vehicle info retrieval
- Durable protective case enhances longevity
Cons:
- Does not support maintenance functions like oil or battery resets
- Compatibility varies by vehicle make and model
- More expensive and complex than basic scanners
Best for: Professional mechanics or serious DIYers needing full-system diagnostics across many vehicle brands.
Not ideal for: Casual users or those only interested in engine emission diagnostics, due to complexity and cost.
Bottom line: A highly capable, multi-system diagnostic tool suited for professional or advanced DIY use, offering extensive coverage at a higher price point.
“A highly capable, multi-system diagnostic tool suited for professional or advanced DIY use, offering extensive coverage at a higher price point.”
ANCEL AD410 Enhanced OBD2 Scanner, Vehicle Code Reader for Check Engine Light
The ANCEL AD410 offers an upgraded experience with its color display and support for a wide range of engine-related diagnostics. It reads and clears fault codes, views live data, and checks vehicle readiness for emissions testing, making it a well-rounded tool for DIY repairs and routine maintenance. Its support for most 1996+ vehicles and multilingual interface broadens accessibility. Compared to the AD310, the AD410 provides a more user-friendly display and additional diagnostic functions, but it still limits diagnostics to engine and emission-related issues. It is not suitable for diagnosing ABS, SRS, or transmission systems, making it less versatile for advanced repairs. The device’s simplicity and clear interface make it ideal for those seeking a straightforward, reliable diagnostic device without extra bells and whistles.
Pros:
- Easy-to-use color display with intuitive menu
- Supports comprehensive engine diagnostics and vehicle readiness
- No need for apps or batteries, powered via vehicle connection
- Supports multiple languages
Cons:
- Limited to engine and emission-related codes
- No ABS, SRS, or transmission diagnostics
- Compatibility should be verified for some specific models
Best for: DIYers and vehicle owners performing routine maintenance and emissions testing on most 1996+ vehicles.
Not ideal for: Users needing multi-system diagnostics or professional repair capabilities.
Bottom line: A user-friendly, feature-rich engine scanner ideal for routine checks and emissions readiness, suited for DIYers and casual users.
“A user-friendly, feature-rich engine scanner ideal for routine checks and emissions readiness, suited for DIYers and casual users.”
As an Amazon Associate we earn from qualifying purchases.
Before You Start
Ensure your vehicle is parked safely and the transmission is in ‘Park’ or ‘Neutral.’ Locate the OBD-II port, typically beneath the dashboard on the driver’s side. Read your vehicle’s manual if unsure about the port location. Have your device charged and the scanner software installed or ready to use. Confirm that your vehicle’s battery and electrical system are in good condition to prevent errors during diagnostics.Step-by-Step Instructions
Step 1: Locate the OBD-II port
Find the OBD-II port in your vehicle, usually beneath the dashboard on the driver’s side near the steering column. It may be behind a cover or panel that you need to remove.
Tip:Consult your vehicle’s manual if you have trouble locating the port. Some vehicles may have the port in different locations, such as under the glove box or near the center console.
Check: You should see a 16-pin connector that is easily accessible and unobstructed.
Step 2: Connect the scan tool to the vehicle
Insert the OBD-II scanner plug firmly into the port until it clicks into place. Ensure the connection is secure.
Tip:If using a Bluetooth or Wi-Fi scanner, activate pairing mode and ensure your device is ready to connect.
Check: The scanner is connected securely, indicated by lights or display signals on the device, and is ready for communication.
Step 3: Power on the vehicle and scan tool
Turn the ignition key to the ‘On’ position, or start the engine if your scanner requires the engine to be running. Power on your scan tool if it doesn’t automatically turn on.
Tip:Check your device’s instructions for specific power-up procedures. Avoid starting the engine if the scanner does not specify; some diagnostic modes require the engine off.
Check: The scan tool displays a connection status or menu, indicating it is communicating with the vehicle’s systems.
Step 4: Select the diagnostic function
Navigate through the scan tool’s menu to select ‘Read Codes,’ ‘Diagnostics,’ or similar options. Choose the appropriate system (engine, transmission, ABS, etc.) if prompted.
Tip:If unsure, start with ‘Read Codes’ to retrieve stored trouble codes from the engine control unit.
Check: The device displays a list of codes or system data, indicating successful communication.
Step 5: Retrieve and record trouble codes
Allow the scan tool to retrieve stored diagnostic trouble codes (DTCs). Write down or save these codes for reference.
Tip:Note both the code number and the description if available. This helps in troubleshooting later.
Check: You have a list of trouble codes displayed on your device, ready for interpretation.
Step 6: Interpret the codes and data
Use the scan tool’s built-in guide or an online database to understand what each code indicates. Cross-reference codes with vehicle symptoms or recent repairs.
Tip:Most scanners provide brief descriptions of codes; further research may be necessary for complex issues.
Check: You understand the likely causes associated with the trouble codes retrieved.
Step 7: Clear the trouble codes (optional)
If you want to reset the check engine light or clear previous codes, select the ‘Clear Codes’ or ‘Erase’ option on your device.
Tip:Only clear codes after noting them and understanding potential causes. Some codes may reappear if issues persist.
Check: The device confirms codes have been cleared, and the check engine light resets on the vehicle dashboard.
Common Mistakes to Avoid
- Connecting the scanner without turning on the ignition — Power on the vehicle or at least switch the ignition to the ‘On’ position before connecting the scanner.
- Using an incompatible scan tool — Verify that your scanner supports your vehicle’s make, model, and year before purchase or use.
- Ignoring safety precautions when working around the vehicle — Ensure the vehicle is parked securely with the parking brake engaged. Avoid disconnecting electrical components while the engine is running unless specified.
- Misreading or misrecording codes — Write down or save codes immediately. Use reputable resources for code interpretation.
Troubleshooting
Problem: Device cannot communicate with the vehicle
Solution: Check all connections are secure. Verify the vehicle is in the correct mode (engine off or on as required). Try restarting the device and vehicle.
Problem: No codes found even when the check engine light is on
Solution: Ensure the vehicle’s systems are capable of storing codes. Clear existing codes and run a new scan. Confirm the scanner’s compatibility.
Problem: Codes are unclear or not listed in the scanner manual
Solution: Use online databases or vehicle-specific repair guides to interpret the codes. Consult a professional if needed.
What Success Looks Like
You successfully retrieve and interpret diagnostic trouble codes, understand their implications, and clear the codes if needed. The scanner communicates properly, and the vehicle’s dashboard indicates no unresolved issues.
Next Steps
Use the information from the scan to perform repairs or further diagnostics. Keep a record of codes for future reference. Repeat the scan after repairs to verify the issue is resolved. Consider professional diagnosis for complex or persistent problems.
Frequently Asked Questions
Can I use a basic scanner for all vehicles?
Basic OBD-II scanners work for most vehicles manufactured after 1996. However, some cars require advanced or manufacturer-specific tools for complete diagnostics.
Is it safe to clear codes myself?
Yes, clearing codes is safe if you understand what the codes mean. Only clear codes after noting them and ensuring the underlying issue has been addressed.
How often should I scan my vehicle?
Scan your vehicle if the check engine light turns on, before and after repairs, or periodically (every 6-12 months) for preventive maintenance.
Fall Picks
fall essentials
As an affiliate, we earn on qualifying purchases.